Scenes & Environments
Visualize Scene
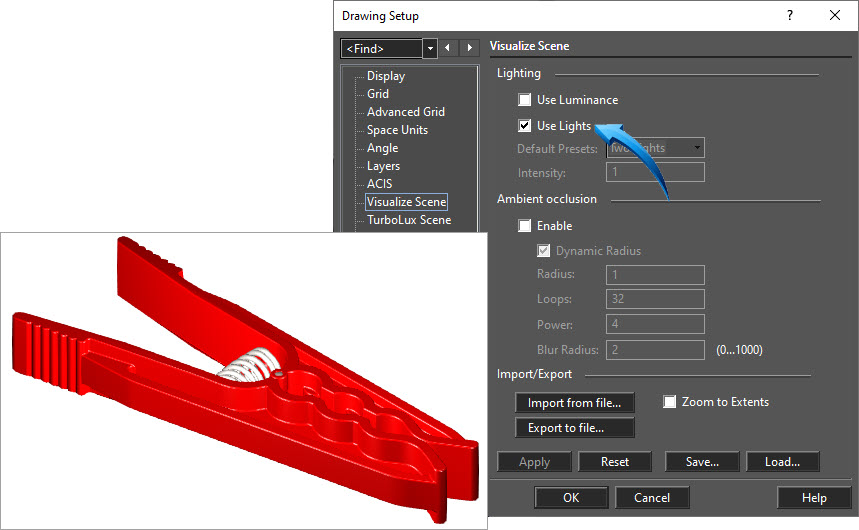
Options > Visualize Scene
Lights
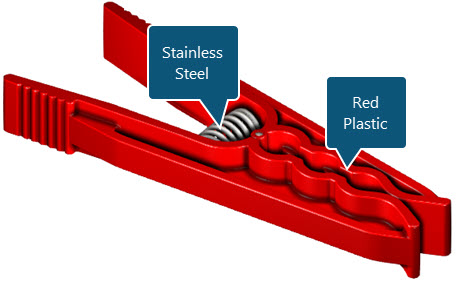
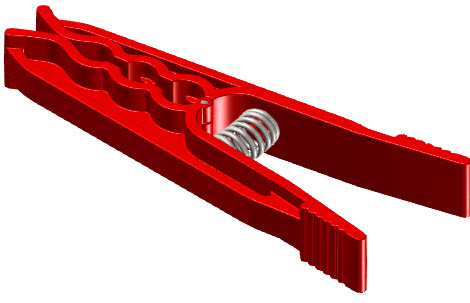
In the example below, the clothes peg has been designed with the following material properties :
- Red Plastic
- Stainless Steel
Both material properties are created using a blend of colors with specific reflectivity and gloss.
Their specific material properties are found by selecting the part, and viewing their 3D Material Properties in the Selection Info palette. Details of the specific materials are found by double-clicking onto the part, and selecting Properties > Materials from the context menu. By selecting Visualize > Edit, the degree of color and reflectivity is shown in detail.
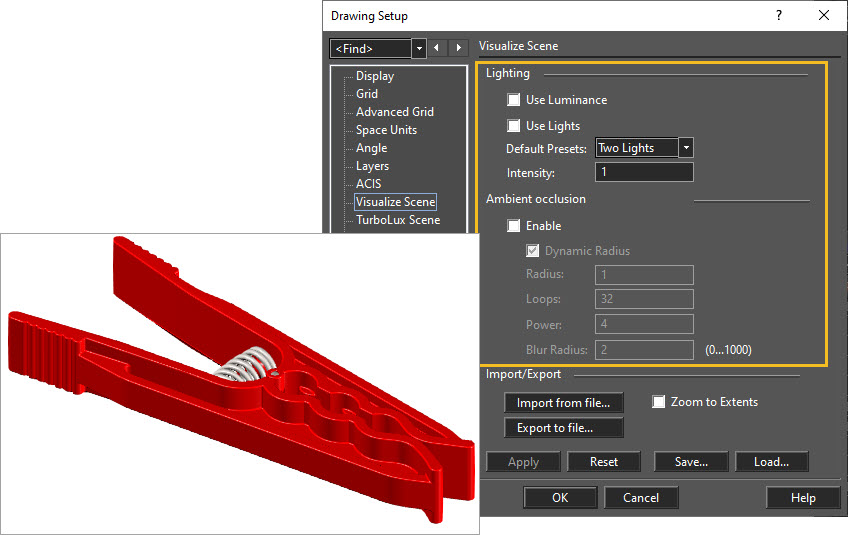
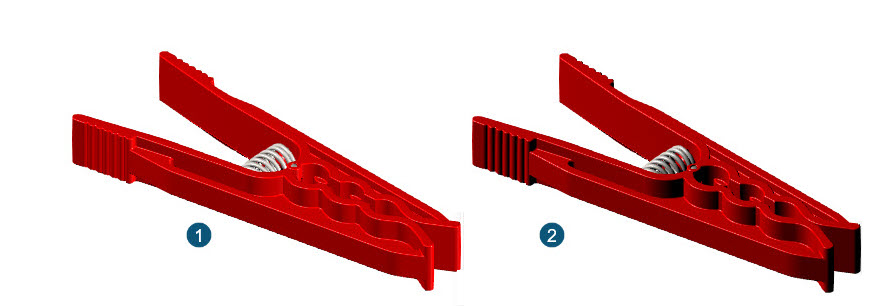
In the example below, the part is shown without lights or luminance. Very basic lighting conditions are supplied which correlate to their surface materials.
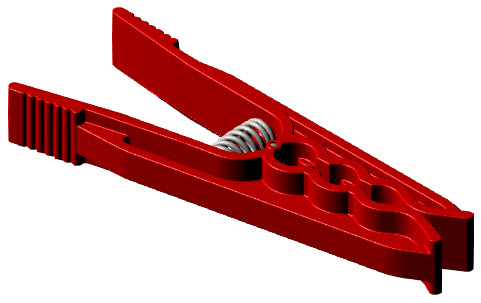
Two Lights
To add lights to the scene, navigate to Options > Visualize Scene and activate the Use Lights option from the Lighting tile. In so doing, exterior and interior surfaces are shaded, creating a depth of color and texture, shown below. The lighting and shading extends to the corrugated and curved surfaces, creating a more realistically visual appearance.
In this example, below, the Two Lights options is used. The surfaces of the object are highly illuminated with very little specular color or texture.
One Light
By adjusting the Lights option to One Light, less illumination is provided, casting the object in a more intense color and shade. The edges of the part are well-defined, but less light is reflected off the surface, shown below.
Back Light
By adjusting the Lights option to Back Light, surface edges which would be furthest from the light source are illuminated. In the example below, the exterior and interior sides of the part are shown in detail, but less light is reflected from the top surface of the object.
Luminance
By activating the Luminance option, heightened color intensity is applied to the scene. In the example below left, the Luminance is activated. The example below right shows the Luminance deactivated.
The Luminance factor increases the lighting intensity in a generalized pattern over the surface of the part, making the choice to activate or deactivate the Luminance option a decision based entirely on the desired result. The image below left shows the Luminance option activated.
Depending on the material type, the surface texture of the part is shown in greater depth when Luminance is deactivated, shown below right.
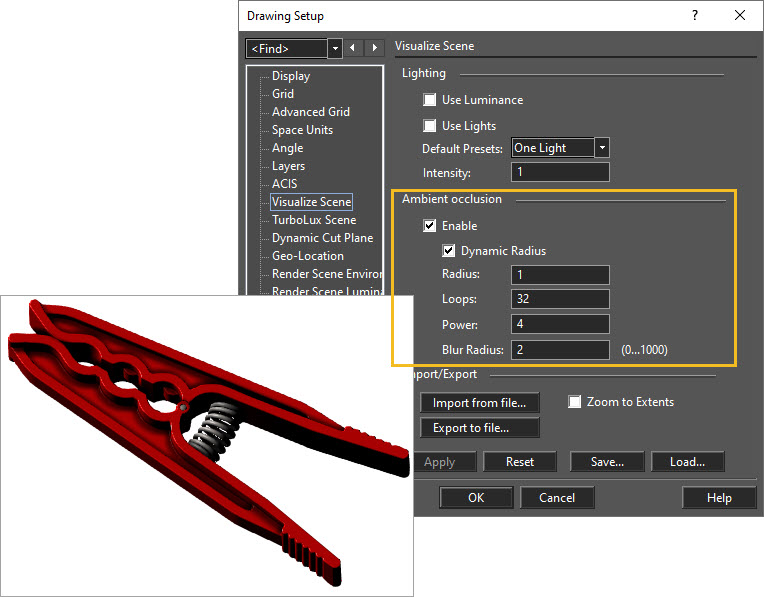
Ambient Occlusion
Ambient occlusion adds depth and realism to the final image by creating shadows where objects intersect or are close to each other, enhancing the overall visual quality.
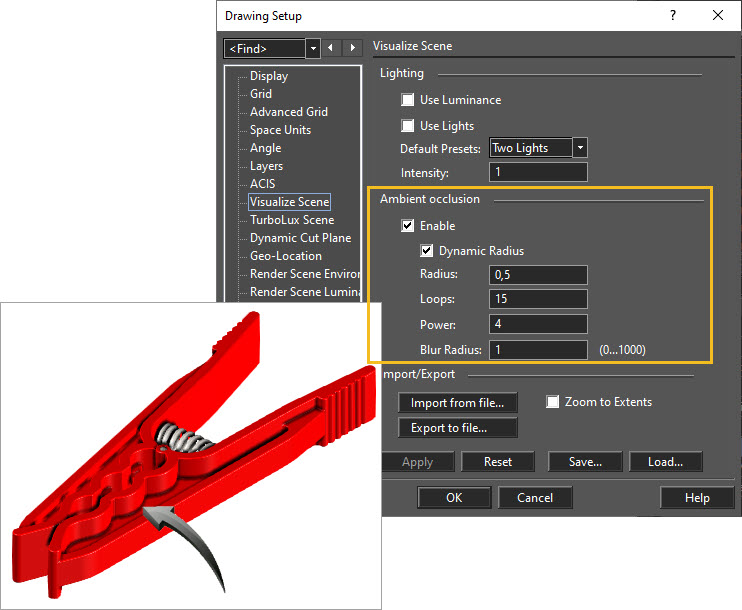
The conditions of ambient occlusion can be adjusted to create greater depth and shadows. The Dynamic Radius shading is shown for the example below.
By adjusting the Dynamic Radius values of the Ambient Occlusion, varying depths of color and shading are produced, particularly in objects with close proximity. See example below.
Worked Example
- Download, save to your device and open the Pegs drawing.
- The Layers and Materials for the parts in the drawing are pre-formatted and saved within the drawing. Double-click onto a part to examine its material properties.
- A Block of the part is stored in the Blocks palette and can be dragged into the editor should you wish to experiment with multiple parts.
- Use the examples outlined above to create environments for this part.